
650Vue Part 9: Machine-Language Monitor
At this point, 650Vue can display its registers on a web page, and we can press the "RUN" button and watch the program counter increment endlessly until we get bored and ask it to stop. We need more ways to communicate with the machine—to write values to the registers, and to read from and write to RAM. A machine-language monitor is an authentic way to enable that communication.
A machine language monitor is a piece of software that allows you to view and change memory locations and registers. A simple monitor will let you examine memory; you can see the hexadecimal value stored in each location. You can write code in machine language by putting hexadecimal values directly into memory. Just fire up the monitor, decide where you want your program to reside, and type:
> c000 a2 00 bd 0f c0 f0 07 9d 00 10 e8 4c 02 c0 00 48 65 6c 6c 6f 2c 20 77 6f 72 6c 64 21
...and your program is ready to run. Simple, right?
Of course, pure hexadecimal (well, pure binary, really) is a terrible way to think
about program code—unless you're a computer—so we use something called assembly
language to make the machine code more readable for humans. Instead of a2 00,
we can write LDX #$00 which means "load a zero into the x-register". More sophisticated
monitors will have an assembler that translates human-readable assembly language
instructions into the binary the computer prefers, and a disassembler that shows the
contents of memory in a format that humans prefer. A decent monitor is essential for working
in machine language.
Under ordinary cicumstances, a machine-language monitor is a program that lives somewhere in the machine's memory. The monitor might be built-in (as is the case on the old PET and CBM machines), or it might be loaded into memory from tape or disk. The point is that a programmer would run a monitor program on a computer, and use it as a tool to write other programs.
This approach presents an unfortunate problem for 650Vue in its currently brainless state; there's no way to get 650Vue to run a monitor program, or indeed a program of any kind. Fortunately, Vue.js lets us cheat a bit; we can write a monitor component in Javascript, and use Vue's reactivity to allow us to interact with the virtual machine from the outside, almost as though we were using a modem and terminal program.
Taking inspiration from VT-100 terminals and old line-input editors, the template for the
Terminal component that houses the machine-language monitor is deceptively simple
(Figure 1):
<template>
  <div>
    <pre v-html="output"></pre>
    <input ref="inputLine" id="command" :class="active" maxlength="40"
           v-model="command" v-on:keyup.enter="send" />
  </div>
</template>
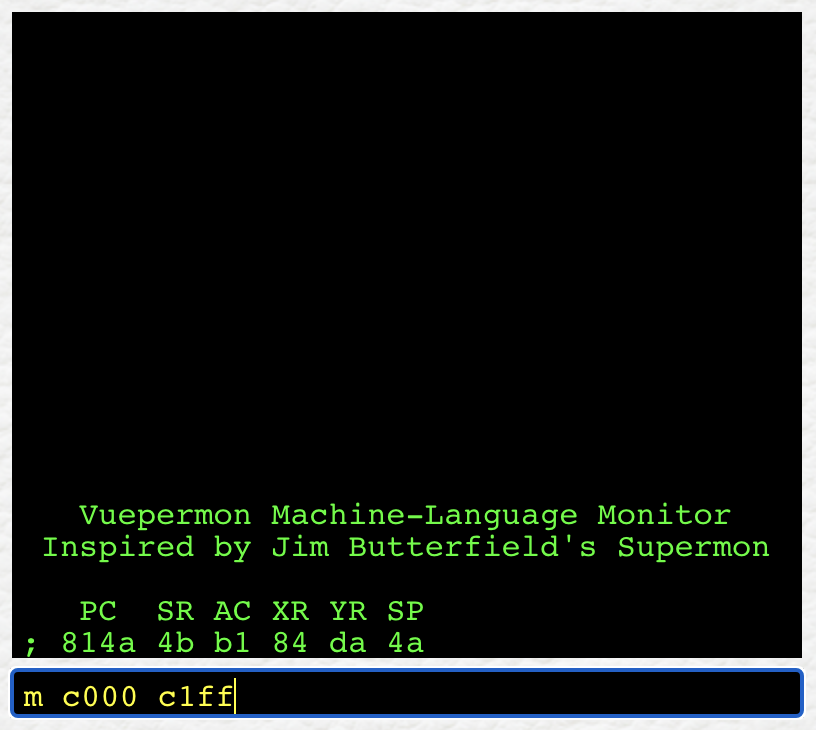
The template in Figure 1 produces the visuals in Figure 2. The large, squarish region at the top is
a 40-column, 20-line output display "screen", wrapped in <pre> tags so that its
contents are monospaced. Every new line of output appears at the bottom, causing the content already
on the screen to scoll upwards. Once a line disappears off the top of the screen it's gone forever;
there's no buffer and no scolling back.
The smaller region underneath the screen is an HTML text input control styled to resemble the output screen. Users type their commands into the input box, and the terminal responds via the screen above. The original commit had a submit button in its template:
<button @click="send">SEND</button>
that, when clicked, called a send() method to handle whatever command the user had typed
into the input line.
There's actually no need for a submit button, though—using v-on lets us
bind the call to send() to the enter key. The user types a command, and when
they press enter (technically when the enter key is released), their input is processed. From the
user's point of view, it feels as though they're typing commands directly into the terminal.
The machine-language monitor is the terminal's software. On of my favourite monitors for the Commodore 64 was Supermon64 by Jim Butterfield, so I just had to call my monitor Vuepermon. When Vuepermon starts up, we're greeted with a welcome message: "Vuepermon Machine-Language Monitor/Inspired by Jim Butterfield's Supermon", followed by a display of all the 6502's registers. If everything is set up correctly, Vupermon's register display should report the same numbers we see in the LEDs on the 650Vue panel.
The send() method that sends user commands to the monitor program is shown in
Figure 3:
send() {
  this.outputLine(`<span style="color:yellow;">${this.command}</span>`);

  switch (this.command[0]) {
    case 'm':
      this.showMemory();
      break;
    case 'r':
      this.showRegisters();
      break;
    case '>':
      this.writeMemory();
      break;
    case ';':
      this.setRegisters();
      break;
    default:
      this.outputLine('?');
  }
}
The first thing send() does is echo the user's output to the terminal screen. The rest
of the method is just a big ol' switch block to interpret the user's command. (Early versions used an
if...else if pattern.) If Vuepermon can't understand the user's input, it replies with
a helpful error message: ?.
The original machine-language monitors had to run in a very small amount of memory. The smallest
monitor I know of is Tinymon, written for the unexpanded VIC-20. Tinymon clocks in
at just over 1Kb—living up to its name! To keep these monitors small, all commands had to be
one character long, so m stood for "show Memory", r stood for
"show Registers", and so on. There was no room left over for meaningful error messages or any
of the other user-friendly frills we expect today. The earliest version of Vuepermon had four commands:
m, r, >, and ;:
Vuepermon Command Reference
m [<start_address>] [<end_address>]-
Example:
m bff0 c010
Display up to 128 bytes of memory beginning atstart_address. Each line of the display will list a 16-bit hexadecimal address, then the hexadecimal values of the 8 bytes starting at that address, followed by the ASCII representation of those same 8 bytes. After the first screenful of data, enteringmwith no arguments will continue displaying memory from where you left off. r- Display the 6502 registers.
> <address> <byte> [<byte>] [<byte>] ...-
Example:
> c010 48 65 6c 6c 6f 2c 20
Write a series of hexadecimal bytes to memory, beginning ataddress. You can enter as many bytes as will fit in a single line of input. ; <pc> <sr> <ac> <xr> <yr> <sp>-
Example:
; c000 30 a0 00 00 fd
Set all the CPU registers. You must include all registers in order, from left to right: program counter, status register, accumulator, x-register, y-register, and stack pointer.
These four commands are enough to verify that the terminal component is properly connected to
the Vuex store. Use ; to set the registers, and the 650Vue LED components should update
automatically. The r command should show the correct values in the terminal output.
Use > to put some bytes in memory, and m to see that the correct
values have been placed in the correct locations in RAM.
Now that we have a way to read and write to RAM, we're almost ready to write code that runs on the 650Vue virtual machine. In the next section, we'll connect the terminal to the control logic, look at some simple 6502 opcodes and write our first program.