
650Vue Part 8: Running the Machine
So far, we've built a Vuex store to hold the 6502's registers and created Vue components that allow us to see the registers on a web page in fancy, pretend-LED lights. At this point, the 650Vue app is completely static—we can look but we can't touch. The registers get initialized when the page first loads but then nothing further happens. If we want to see the registers change, we'll need some way to interact with them. A good place to start on some kind of interaction is to make the virtual machine "run". For those following along at home, you can see original commit on Github, although the finished code does look a bit different from the original commit.
What does it mean for 650Vue to run? A real 6502 runs from the time you switch it on until it either crashes or we ask it to stop. While running, the 6502 goes through these basic steps:
- The CPU fetches the instruction stored in memory at the location indicated by the program counter (PC).
- The fetched instruction gets decoded and executed.
- The PC gets incremented to point to the next instruction.
- The CPU goes back to step 1 for another fetch.
Of course, the behaviour of a real 6502 is a bit more complicated (and we can argue about the order of operations!) but the outline is easy to understand: fetch an instruction, carry it out, and move on to the next one, round and round in an endless loop. We can think of the "fetch-execute-increment" sequence as a single step, and this step is what the running machine does over and over until it is forced to stop.
Our first step is to create a RunCpu component and add some buttons (Figure 1):
<template>
  <div>
    <button @click="run">RUN</button>
    <button @click="step">STEP</button>
    <button @click="stop">STOP</button>
  </div>
</template>
The "RUN" button will start the machine running, and the "STOP" button will stop it. (Proof that programming is rocket science, after all.) The most important button is "STEP". As we saw above, the running operation of the CPU can thought of as a series of steps executed one after the other.
We can't do all the parts of our "fetch-execute-increment" step yet; there are no instructions to fetch, and no logic to execute them. What we can do is increment the program counter, and to handle the increments, we add a mutation to the Vuex store (Figure 2):
mutations: {
  incrementPc({ cpu }) {
    cpu.pc = (cpu.pc + 1) & 0xffff;
  }
}
To increment the PC, all we have to do is add 1 to it, but there is an important detail to consider:
when we add 1 to 0xffff, we get 0x10000, but PC should always be a 16-bit
number, and that means four digits in hex. We want 0xffff to "roll over" to
0x0000, so we apply a bitmask to the result of the increment to make sure that happens.
The bitmask serves another purpose—if something goes wrong somewhere in our virtual machine,
ANDing the PC with 0xffff ensures that PC will always be a legal 16-bit value.
The RunCpu component needs methods for running, stepping, and stopping (Figure 3):
export default {
  data() {
    return {
      timer: null
    }
  },
  methods: {
    ...mapMutations(['incrementPc']),
    run() {
      if (!this.timer) {
        this.timer = setInterval(() => this.step(), 10);
      }
    },
    step() {
      this.incrementPc();
    },
    stop() {
      clearInterval(this.timer);
      this.timer = null;
    }
  }
}
The step() method is simple; all it does for the moment is call the
incrementPc() method defined in Figure 2. The ...mapMutations Vuex helper
lets us replace this.$store.commit('incrementPc'); with the more compact
this.incrementPc(); Because the register display components are reactive, we should expect
to see the PC display increase by 1 any time we push the "STEP" button in the browser.
When we push the "RUN" button, the run() method employs setInterval()
to call step() every 10 milliseconds—that works out to 100 times a second. When the machine is
running, we can watch PC count up very quickly. The stop() method clears the timer,
stopping the calls to incrementPc(). It turns out that setInterval() isn't the best way to run the
virtual CPU in an endless loop, but it's good enough for now. We'll look at a better method in a
future update.
With a little CSS magic, the buttons can be styled as in Figure 4:
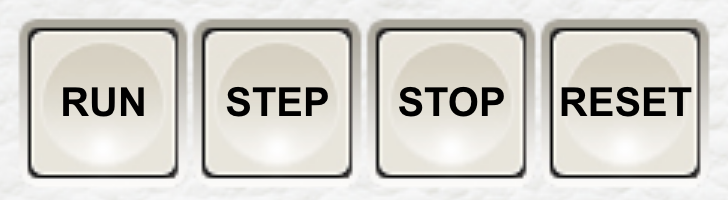
There's an extra button in Figure 4, and that is the "RESET" button. (Please refer to the
original commit). To accomplish the reset,
we'll add a reset() action to the
RunCpu component. By now, it should not be a surprise to see that Vuex gives us a
mapActions helper to make the code a little cleaner (Figure 5):
methods: {
  ...mapActions(['resetCpu']),
  reset() {
    this.resetCpu();
  }
}
Both actions and mutations update state, but there's an important difference. Actions are asynchronous, and mutations are synchronous. When we dispatch an action, it commits mutations to be handled by Vue whenever it is ready. We shouldn't rely on exact timing for an action but we can trust that any components that are watching the store will get updated once the action is complete. In general, it's better to update state by calling an action instead of calling a mutation directly, especially in large Vue apps with many reactive components.
We do want a direct mutation for incrementPc() and any future mutations
that support the fetch-execute-increment cycle, because it's important that the running CPU handles
each execution step one at a time in sequence. An asynchronous CPU could be hard to control once we
try running actual programs on it.
The action and supporting mutations are shown in Figure 6.
mutations: {
  resetRegisters({ cpu }) {
    cpu.ac = 0x00;
    cpu.xr = 0x00;
    cpu.yr = 0x00;
    cpu.sp = 0xfd; // TODO: investigate real behaviour of reset.
    cpu.sr = 0x20; // The UNUSED status flag is always set.
  },
  resetPc({ cpu, ram }) { // destructuring multiple properties
    cpu.pc = (ram[0xfffd] * 0x100) + ram[0xfffc];
  },
  clearStack({ ram }) {
    for (let i = 0x0100; i <= 0x01fd; i += 1) {
      ram[i] = 0x00;
    }
  }
}
actions: {
  resetCpu({ commit }) { // destructured shorthand for context.commit
    commit('resetRegisters');
    commit('resetPc');
    commit('clearStack');
  }
}
The resetCpu action commits three separate mutations. The first one resets the
registers. AC, XR, YR are all set to zero. The status register has its flags cleared except
for bit 6, representing the unused flag. On a real 6502, bit 6 always reads "on" so it doesn't
make sense to turn it off. The stack pointer gets reset to 0xfd, pointing at a location two bytes
below the top of the stack. (Unsurprisingly, the real 6502's reset sequence has a more complicated
relationship with the stack pointer, but the pointer ends up at 0xfd.)
The resetPc() mutation imitates the real 6502 by reading the two bytes stored in
memory at the reset vector. The reset vector holds a 16-bit address in memory at locations
0xfffc and 0xfffd, so our mutation fetches the values stored in the RAM
array and puts them into PC. The value of the reset vector will be come clear once we start
writing actual programs.
The third mutation clears the stack. On the 6502, the stack occupies RAM at memory locations
0x0100 through 0x01ff, so clearStack() just fills these
locations with zeros. The rest of RAM is untouched.
At this point, 650Vue may be completely useless but it does run. In the next section, we'll look at building an interface called a machine-language monitor so that we can communicate with 650Vue through our web browser.